DIY wasp nest removal vs professional treatment: the real risks
When you discover a wasp nest, it’s tempting to deal with it yourself. A quick search will show sprays, powders, and step-by-step guides that make it sound straightforward. In reality, wasp nest removal is one of the riskier jobs around the home - especially once a nest is active.
This guide explains what’s involved in DIY treatment, where it often goes wrong, and why professional treatment is usually the safer option.
Why people try DIY first
There are a few common reasons homeowners consider doing it themselves:
- It looks like a quick fix
- The nest seems small or easy to reach
- You want to avoid a call-out cost
- You’ve seen sprays or kits that claim instant results
In early spring, a very small, visible nest can sometimes be dealt with carefully. The problem is that many nests are not as small or as accessible as they appear, and by the time most people notice them, the risks are higher than expected.
The reality of a wasp nest
By late spring and summer, a nest can contain hundreds or even thousands of wasps. These aren’t passive insects—they actively defend the nest.
When disturbed, wasps can:
- React quickly and in large numbers
- Follow movement and perceived threats
- Sting multiple times (unlike bees)
Even a brief disturbance can trigger a defensive response.
The real risks of DIY wasp nest removal
1) Multiple stings and aggressive behaviour
The biggest risk is provoking the nest. Wasps defend their colony, and even a small mistake—getting too close, using the wrong product, or applying it incorrectly—can trigger a swarm response.
This is particularly dangerous if:
- The nest is large
- The entrance is disturbed
- You’re working at close range
For some people, stings are more than just painful. Severe reactions can require urgent medical attention.
2) Working at height
Many nests are located:
- In rooflines or under eaves
- In loft spaces
- Above doorways or windows
DIY removal often involves ladders, awkward angles, or reaching into confined spaces. Combining height with the risk of being stung significantly increases the chance of falls or accidents.
3) Hidden nests and misidentification
A common issue is not knowing where the nest actually is.
You might see wasps entering a gap and assume:
- The nest is just inside
- It’s small and easy to treat
In reality, the nest could be:
- Deep inside a wall cavity
- Spread across a larger void
- Larger than expected
Spraying the visible entry point doesn’t always reach the nest itself, which means the problem continues.
4) Incomplete or ineffective treatment
Over-the-counter products can work in some situations, but they often:
- Don’t penetrate deep into hidden nests
- Don’t reach all areas of a large colony
- Require repeated applications
An incomplete treatment can make the situation worse by:
- Agitating the wasps
- Causing them to relocate within the structure
- Leading to ongoing activity rather than solving the problem
5) Blocking entry points (a common mistake)
One of the most common DIY mistakes is sealing or blocking the hole where wasps are entering.
This can backfire because:
- Wasps will try to find another way out
- That “new way out” can be inside your home
- You may suddenly see wasps indoors in larger numbers
Blocking access without treating the nest can create a bigger issue than the original problem.
6) Risk to children, pets, and neighbours
DIY attempts don’t just affect the person doing the work. If wasps become agitated:
- Children playing nearby are at risk
- Pets may disturb the area further
- Neighbours can be affected, especially in terraced or semi-detached properties
A disturbed nest can quickly turn into a wider safety issue.
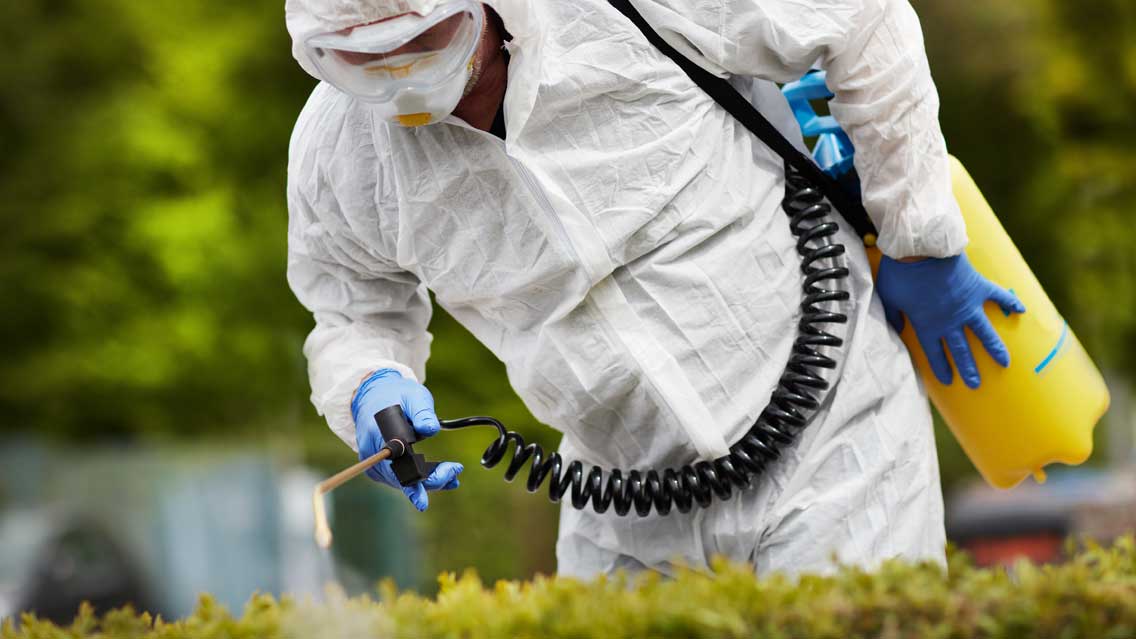
What professional treatment does differently
Professional wasp nest treatment is designed to:
- Target the nest directly
- Minimise disturbance
- Work effectively even in hidden locations
A typical approach includes:
- Identifying the exact nest location
- Assessing risk based on size and position
- Applying appropriate treatment safely
- Giving clear advice on access and aftercare
Professionals also have:
- Protective equipment
- Experience with different nesting scenarios
- Access to products not available to the general public
When DIY might be lower risk
There are limited situations where DIY may be considered lower risk:
- The nest is very small (early season)
- It is fully visible and easy to access
- You can maintain a safe distance
- There is minimal activity
Even then, caution is essential, and if anything seems uncertain, it’s safer to step back.
When you should avoid DIY altogether
It’s best not to attempt DIY removal if:
- The nest is in a loft, wall cavity, or roofline
- It is large or highly active
- It is located near doors, paths, or seating areas
- You have concerns about allergies or reactions
- Access requires ladders or awkward positioning
In these cases, the risks increase significantly.
Key takeaway
DIY wasp nest removal isn’t just about applying a spray—it’s about understanding behaviour, access, and risk.
In many cases:
- The nest is larger than it appears
- The location is more complex than expected
- The response from wasps is unpredictable
Acting early and safely is always the better approach.